Wheel hub fixation
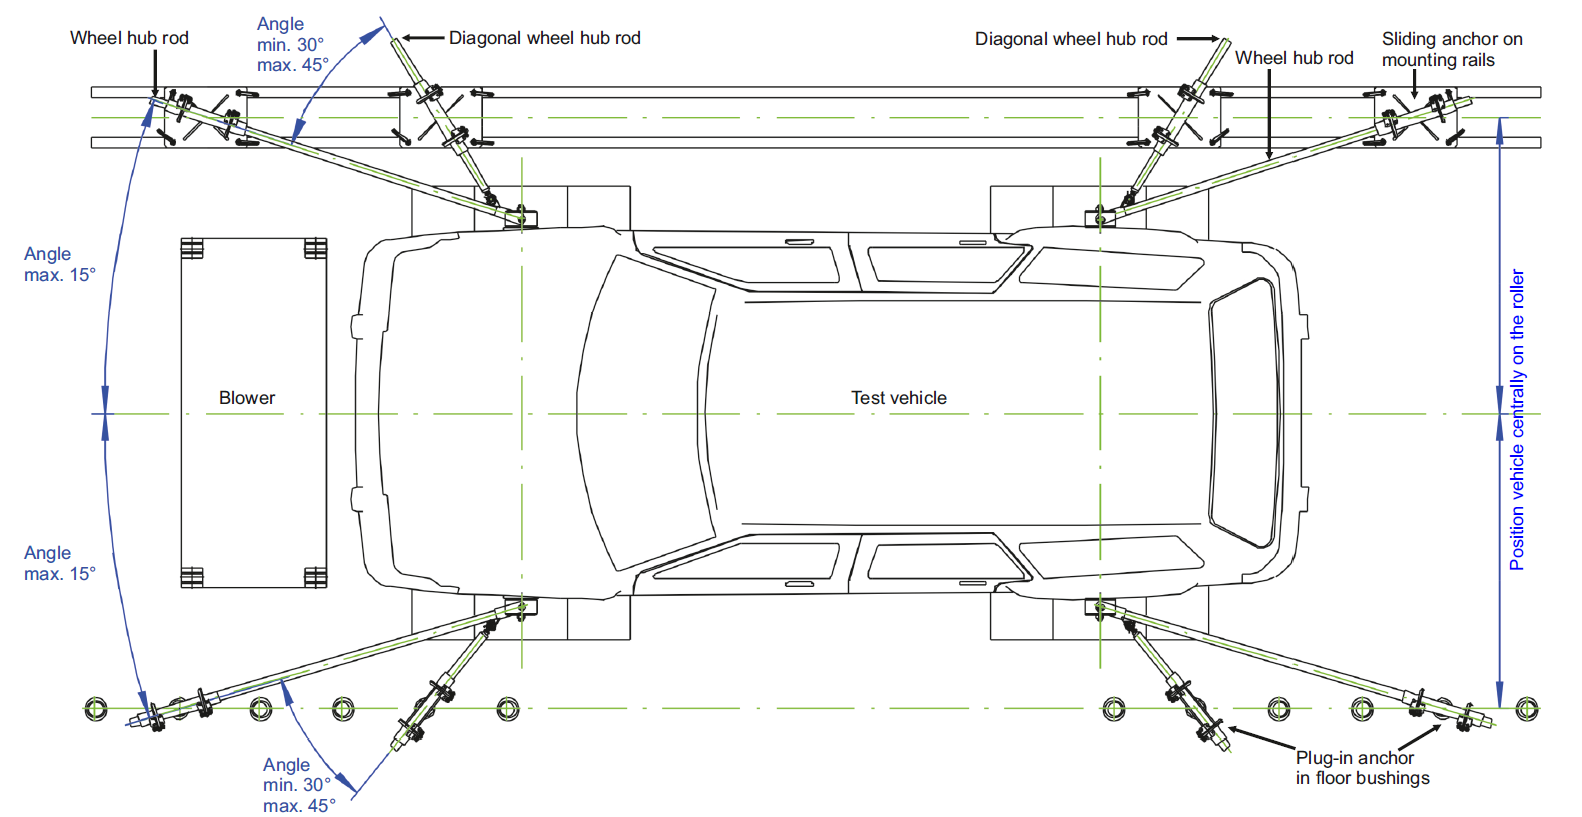
The wheel hub fixation is suitable for standard passenger cars, test vehicles and prototypes up to 3.5 t. To fix the vehicle, two fixing rods and a fixing bearing are attached to each of the moving wheels. The rotating mass at the wheel hub is negligible. The rods are clamped in plug-in or sliding anchors and thus connected to the dynamometer floor.
This type of fixation makes it possible to run all test cycles and test scenarios and can be used for all vehicle types in these weight classes.
Bearing and fixing rods
One of the two rods per fixation triangle is firmly bolted to the fixation bearing. This bearing is placed on a cone-shaped adapter that is mounted on the wheel beforehand. The bearing can be used for test runs up to 300 km/h.
The second rod is connected to the first rod by a ball lock pin. It is used for lateral stabilisation.
The wheel hub rod (RST) is bolted to the fixation bearing. This connection is made quickly, easily and yet securely with just one screw.
Clamping
Documentations
Here you will find a selection of operating instructions for wheel hub fixation.
Further information & downloads on this topic can be found in the section
Operating instructions
Wheel hub fixation – assembly
Step by step
The assembly of the wheel hub fixation is shown here step by step. The system shown is equipped with plug-in anchors. Sliding anchors can also be used. In practice, the set-up time per fixing triangle is about two minutes (rule of thumb: 1 minute per rod).
Mount the rim adapter set on the wheel using bolts. Tighten the bolts with a torque spanner.
Drive the vehicle onto the test stand and align it, e.g. using the centring assistant. Apply the handbrake.
Position the first anchor as close as possible to the wheel. The rod must be as parallel as possible to the vehicle.
Position the second anchor as close as possible to the wheel. Angle between first and second rod: 30° to 45°.
Slide the fixation bearing with pre-mounted wheel hub rod onto the locating cone.
Connect the locating bearing to the locating cone using the outer wheel bolt, tighten the bolt to 120 Nm.
Insert the wheel hub rod into the opened rod receptacle of the first anchor.
Close the rod holder and lock both locking clamps. These must engage perceptibly.
Close the locking lever on the first plug-in anchor. This fixes the anchor in the floor socket by clamping.
Insert one locking pin on each side of the rod holder through the hole in the wheel hub rod.
Insert the diagonal wheel hub rod into the second anchor and connect it to the wheel hub rod.
Clamp the second anchor completely. Then roll up the vehicle and fix the remaining wheels. Done.